The Magento 2 AMP extension provides you with various templates to display AMP banners, sliders, subcategories, and other widgets. The following guide describes two ways of creating AMP widgets: using the “Content” -> “Widgets” Menu and Adding Widgets to CMS pages/blocks. Both methods allow you to create the following types of AMP widgets:
- AMP Catalog New Products List
- AMP Category Product Carousel
- AMP Newsletter Subscription Form
- AMP Slider
- AMP Static Banner
- AMP Subcategories
- AMP Video
How to Add AMP Widgets Using “Content” -> “Widgets” Menu
Adding AMP Widget
Step-by-step guide:
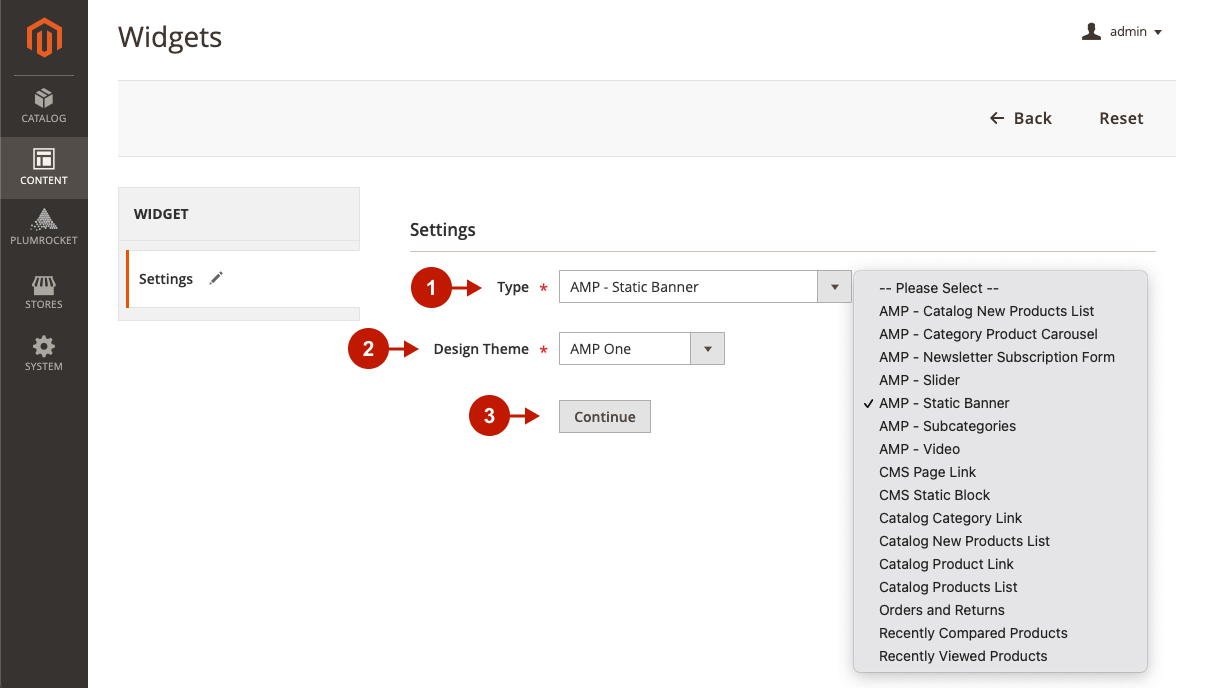
- In the main Magento menu, go to Content -> Elements -> Widgets.
- Above the Widgets grid, click Add Widget.

Step-by-step guide:
- “Type”: select the type of AMP widget from a drop-down list.
- “Design Theme”: choose AMP theme to display widget on. You can select the default AMP Theme One or any custom AMP theme if you have created one.
- Click Continue to proceed.
Configuring Storefront Properties
Step-by-step guide:
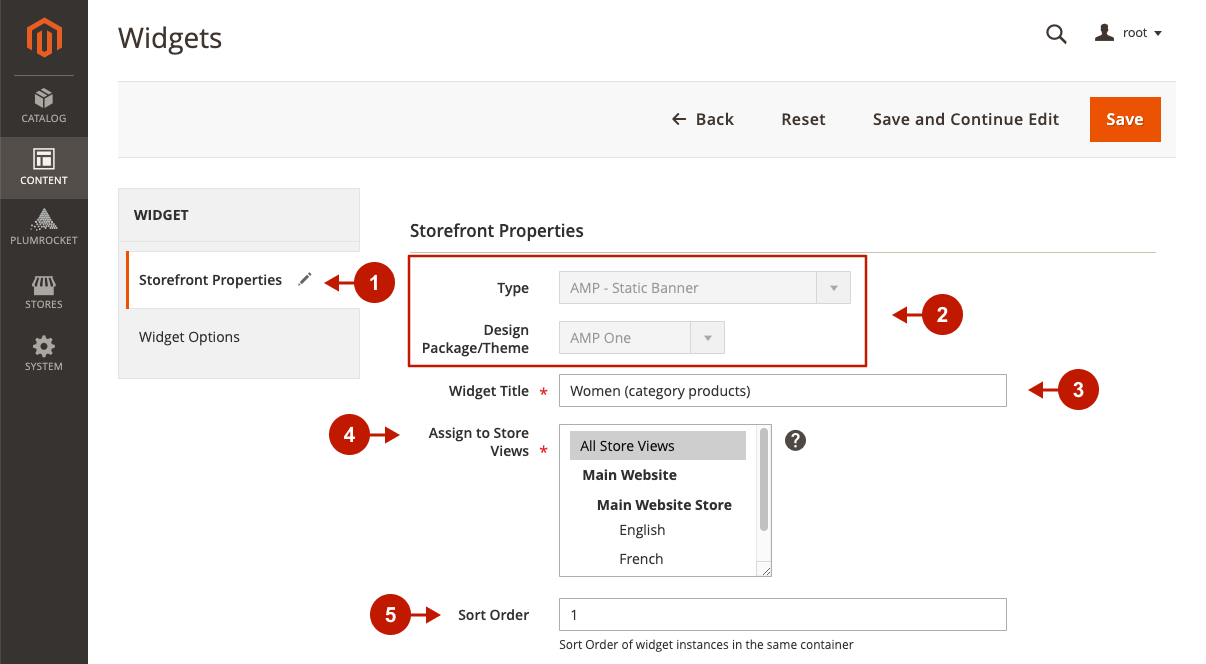
- Go to the Store Properties tab.
- You have already set the “Type” and “Design Package/Theme” options in the previous step.
- “Widget Title”: enter a descriptive title for the widget. This title is visible only from the backend.
- “Assign to Store Views”: select the store view(s) where the widget will be visible.
- (Optional) “Sort Order”: enter a number that determines the order this item appears with others in the same container.
Step-by-step guide:
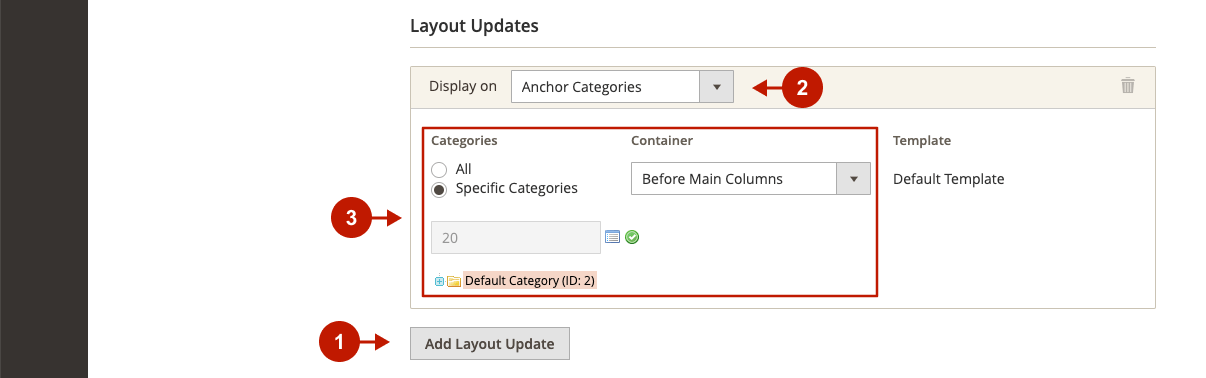
- “Add Layout Update”: press this button to configure the widget placement.
- “Display On”: select the pages, categories, or products where you want the widget to appear.
- Configure widget layout. Configurations there will differ depending on the selected Display On option.
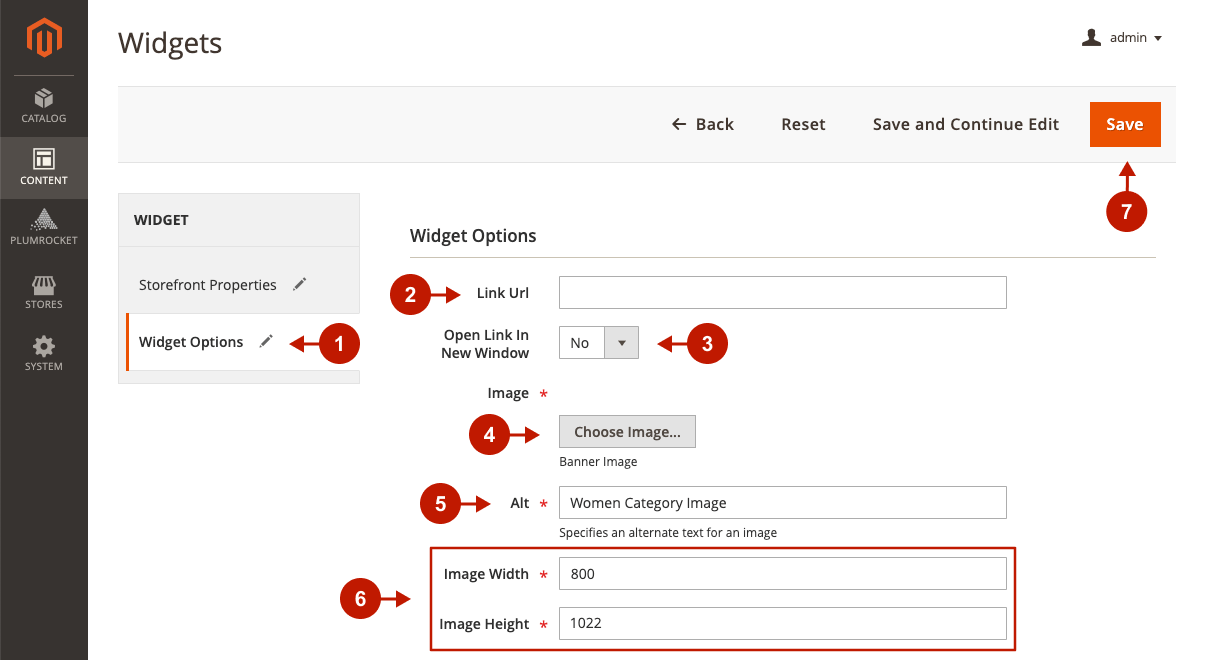
Configuring Widget Options
Depending on the selected widget type, the following Widget Options configurations will differ. In this example, we will show you how to configure the Static Banner widget type.
Step-by-step guide:
- Switch to the Widget Options tab.
- “Link Url”: optionally provide a URL of a widget if you want it to take users to a specific page.
- “Open Link in New Window”: set the option to Yes if you want to open the provided link in a new window.
- “Image”: click Choose Image to select the image to be showcased on the widget.
- “Alt”: specify an alternative text for the selected image.
- Set image dimensions.
- Click Save to save the widget.
The widget will appear in the Widgets grid. Clear Magento cache to display the widget on the frontend.
How to Add AMP Widget to CMS Pages/Blocks
Unlike the “Content” > “Widgets” Menu, you can display AMP widgets anywhere within the CMS page/block content. Therefore, this method is more flexible if you add widgets to complex CMS pages and CMS blocks with plenty of elements.
In the following steps, you need to add AMP widgets to the AMP Content field of the needed CMS block or page.
Adding AMP Widget
In this example, we will show you how to add AMP widgets to a Homepage. However, you can add AMP widgets to any CMS page or CMS block for AMP following the guide below.
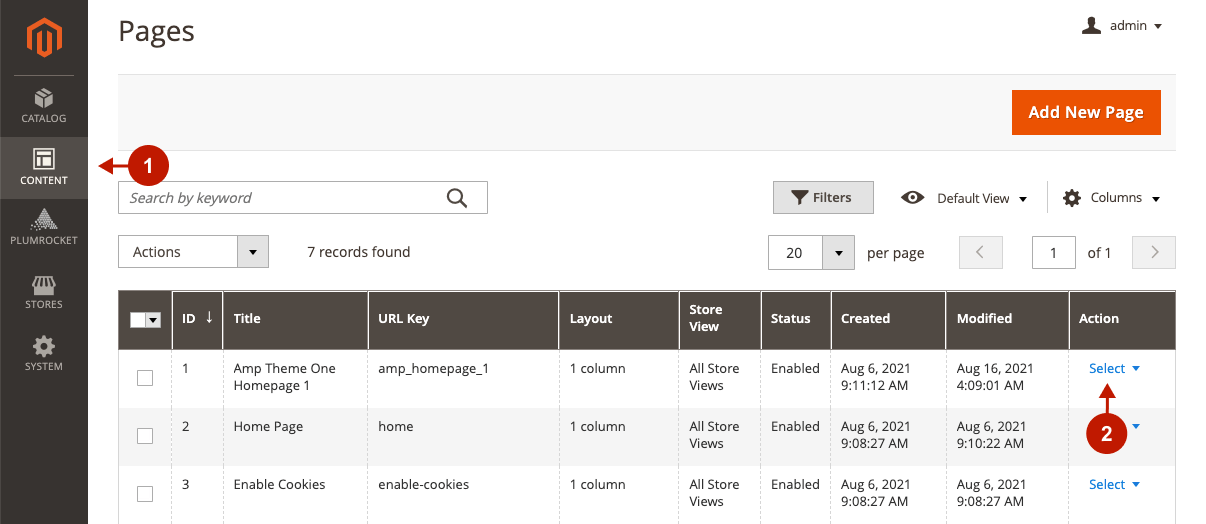
Step-by-step guide:
- In the main Magento menu, navigate to Content -> Pages.
- In the CMS Pages grid, find the needed page where you want to add a widget. Click Select -> Edit on the corresponding record to edit the CMS page.
Step-by-step guide:
- Scroll down to the AMP Content section, click where you want to insert a widget and press the Insert Widget button.

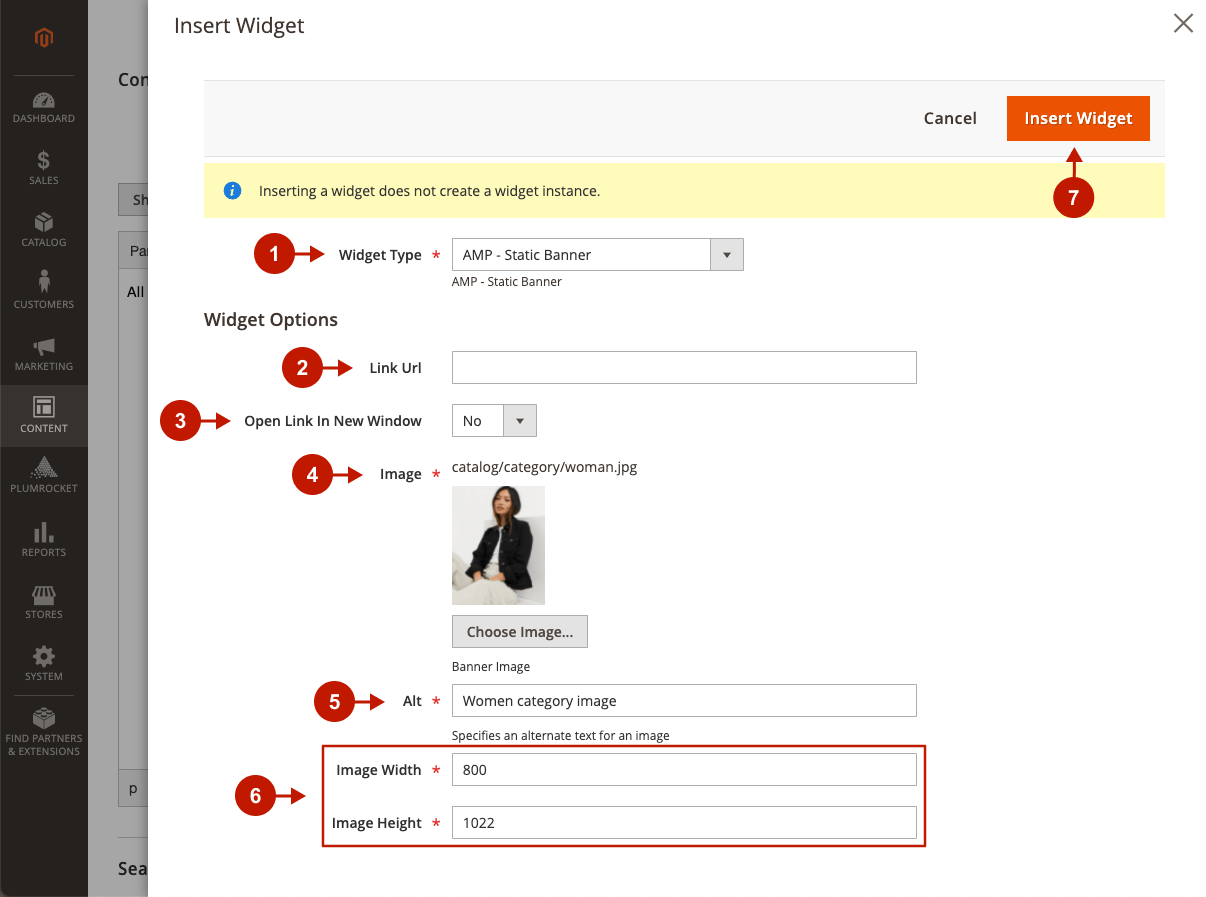
Configuring Widget Options
Step-by-step guide:
- “Widget Type”: select the widget type from the drop-down list.
- “Link Url”: optionally provide a URL of a widget if you want it to take users to a specific page.
- “Open Link in New Window”: set the option to Yes if you want to open the provided link in a new window.
- “Image”: click Choose Image to select the image to be showcased on the widget.
- “Alt”: specify an alternative text for the selected image.
- Set image dimensions.
- Click Insert Widget.
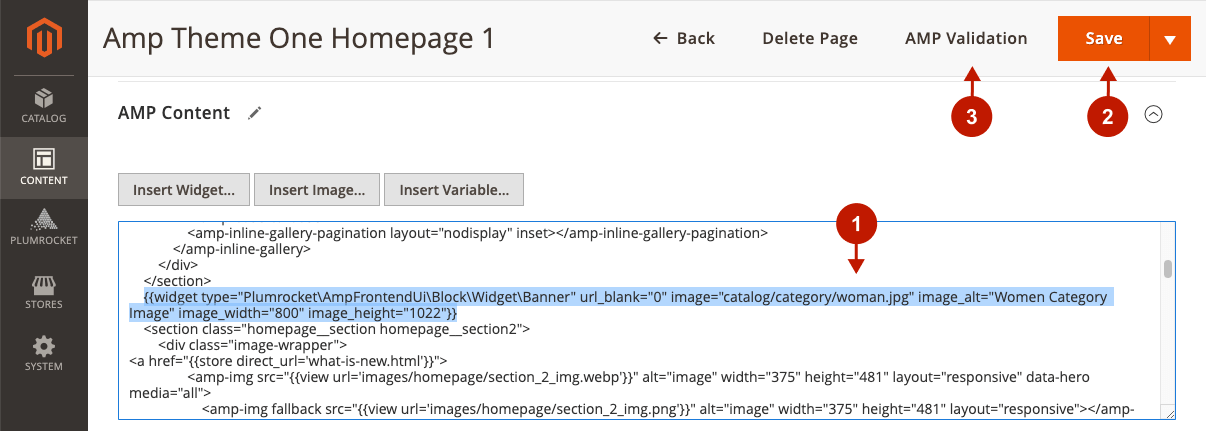
Step-by-step guide:
- Now you can see that the widget code appeared in the AMP content section.
- Click Save to apply all changes made to the Amp Theme Ome Homepage 1.
- Click AMP Validation to check if your CMS page is valid after the changes have been made.
Checking the Result
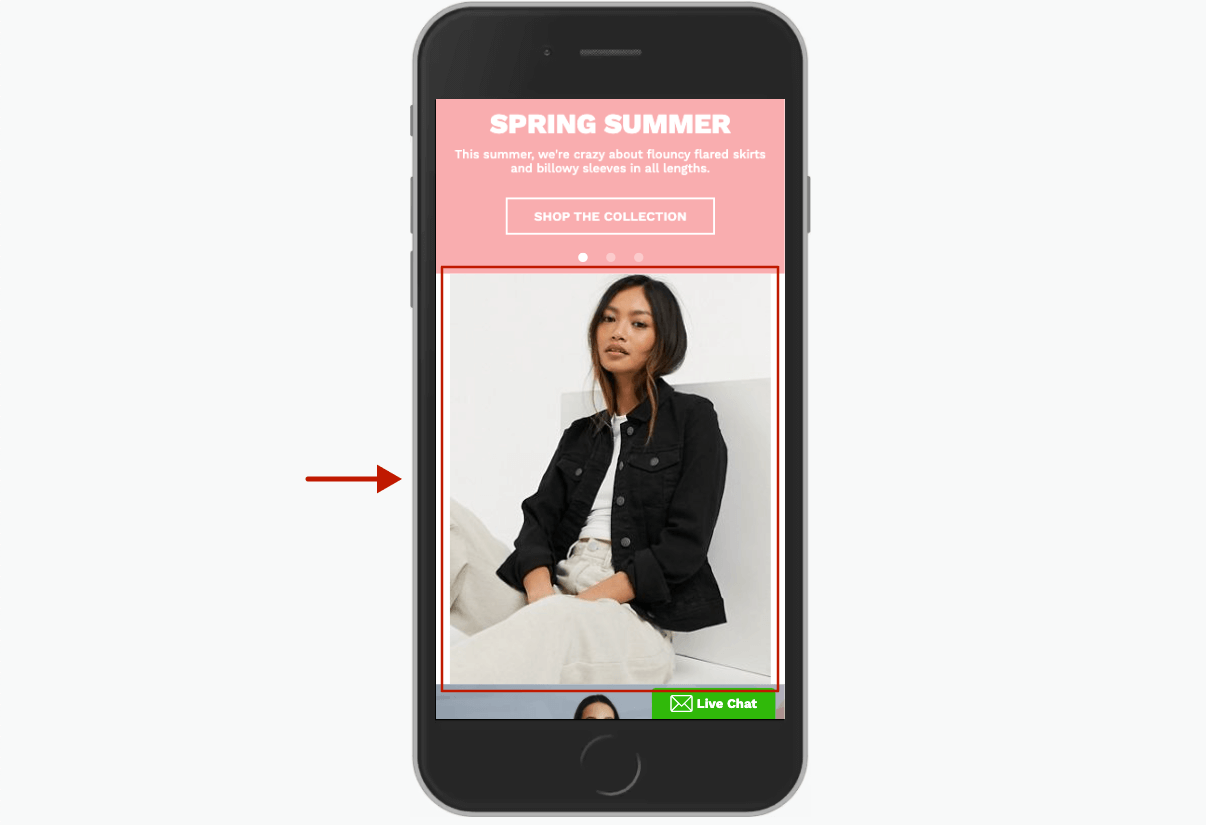
Go to your storefront and check the widget display. This is how the created widget looks on the Magento 2 frontend: