Configuring Checkout Success Page Extension
Here you will learn how to correctly configure Magento Checkout Success Page Extension. To do this, please follow the instructions below
Detailed description:
- Press “Plumrocket” tab in the menu.
- Select the “Checkout Success Page” module.

Detailed description:
- Enable Extension: allows you to enable or disable this Checkout Success Page Extension.
- Option “Serial Key”: enter unique serial key provided after the purchase for legitimate and proper functioning of your extension. Note: In most cases this field will be prefill with serial key automatically and the green check mark will be displayed. Otherwise please read article Serial Key Activation in order to find and paste your serial key manually.
- “Subscription Settings”: allows you to display the subscription section, where users can sign up to your newsletter. Guest customers can also enter their password and register their account at your store.

Detailed description:
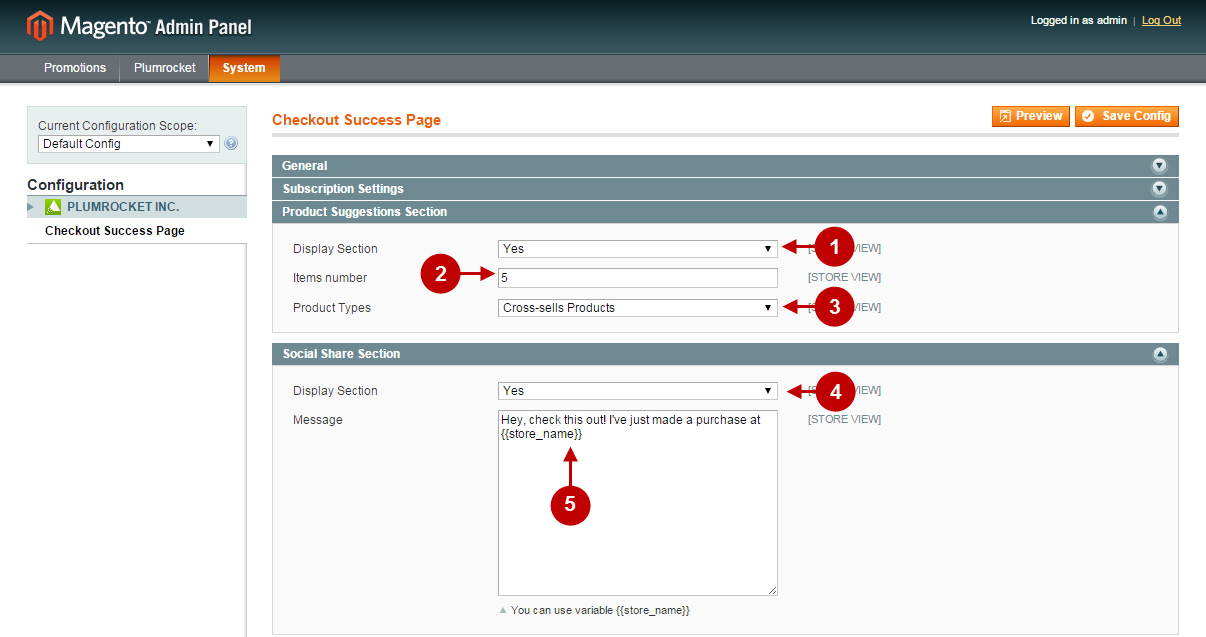
- Enable “Product Suggestions Section” to display the suggested products to your customers.
- “Items Number” option: lets you specify how many suggested items will be displayed in this section.
- “Product Types” drop-down menu allows you to select the type of suggested products to be displayed on your Magento Checkout Success Page. Choose among Related Products, Cross-sells, Up-sells and Recently Viewed Products. Note: In order to display your Related Products, Cross-sells, Up-sells in the “Product Suggestions Section”, they should be pre-configured for a specific product that has been purchased. To do this, please read this article “Managing Cross-sells in Magento”.
- “Social Share” section: allows you to display Social Share buttons customers can use to share their order details.
- Using the “Message” text field you can specify what message will be displayed when customers socially share their orders.
Detailed description:
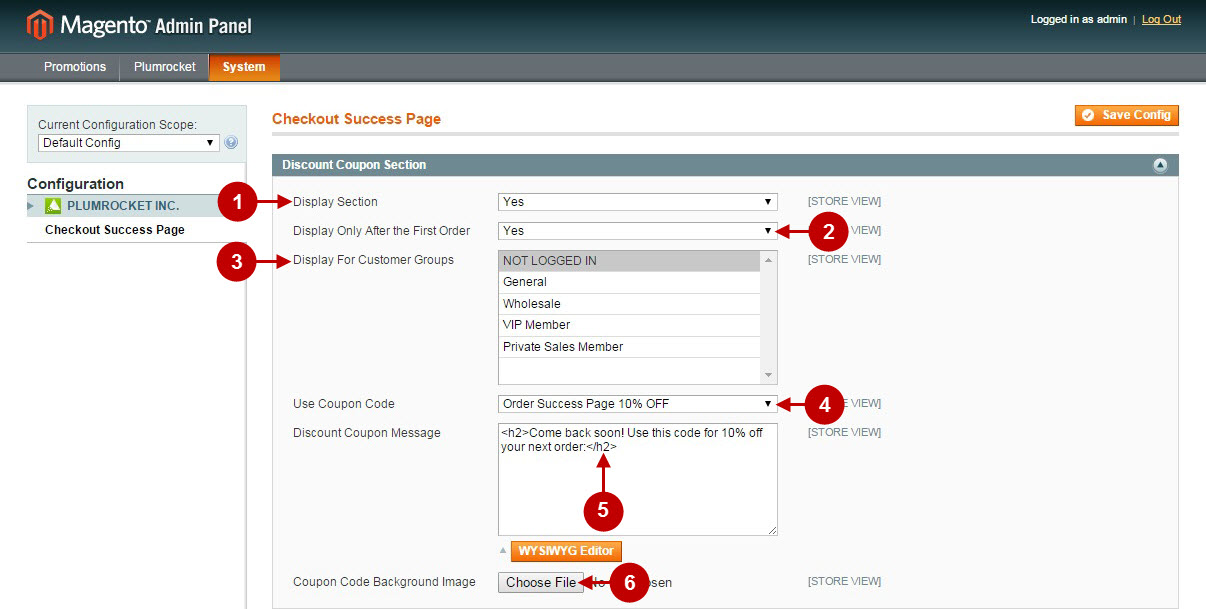
- “Discount Coupon”: lets you display the discount coupon section. Here you can show static codes, or automatically generated coupons, that will allow your customers to get a discount on the next purchase. In order to create automatically generated coupons, please read an article Creating Shopping Cart Price Rules In Magento .
- “Display Only After the First Order”: if enabled, this option will display coupon section only after the first order your registered customers make.
- “Display For Customer Groups” option: lets you select which customer groups will see the discount coupon section.
- “Use Coupon Code” option: you can configure what type of discount your customers will get. This can be static coupon, or coupon based on Shopping Cart Price Rule (see above).
- “Discount Coupon Message” option: allows you to specify what coupon message will be displayed in Discount Coupon Section.
- “Coupon Code Background Image”: allows you to select background image of the discount coupon section.
Detailed description:
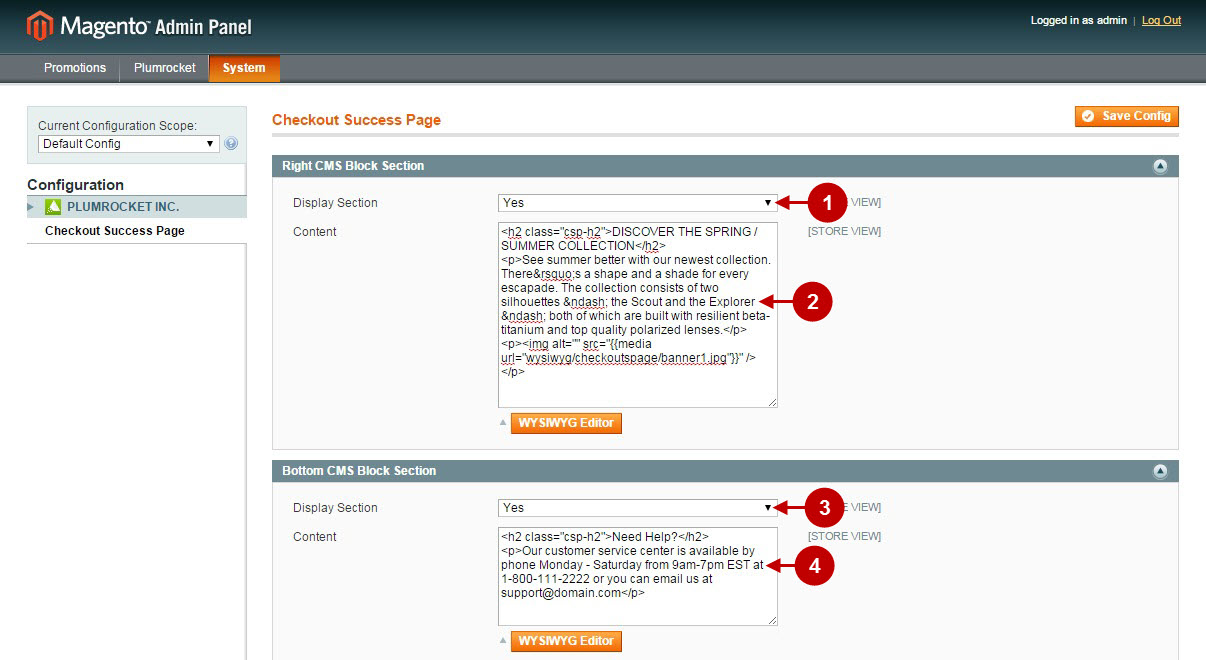
- “Right CMS Block” section: allows you to display right CMS block section, where you can advertise your other special deals for customers.
- “Content” text area: here you can specify what content will be displayed in your right CMS block section.
- “Bottom CMS Block” section: lets you to display bottom CMS block section, where you can place your current special offers for customers.
- “Content” text area: in this text area you can specify what content will be displayed in your bottom CMS block section.
Detailed description:
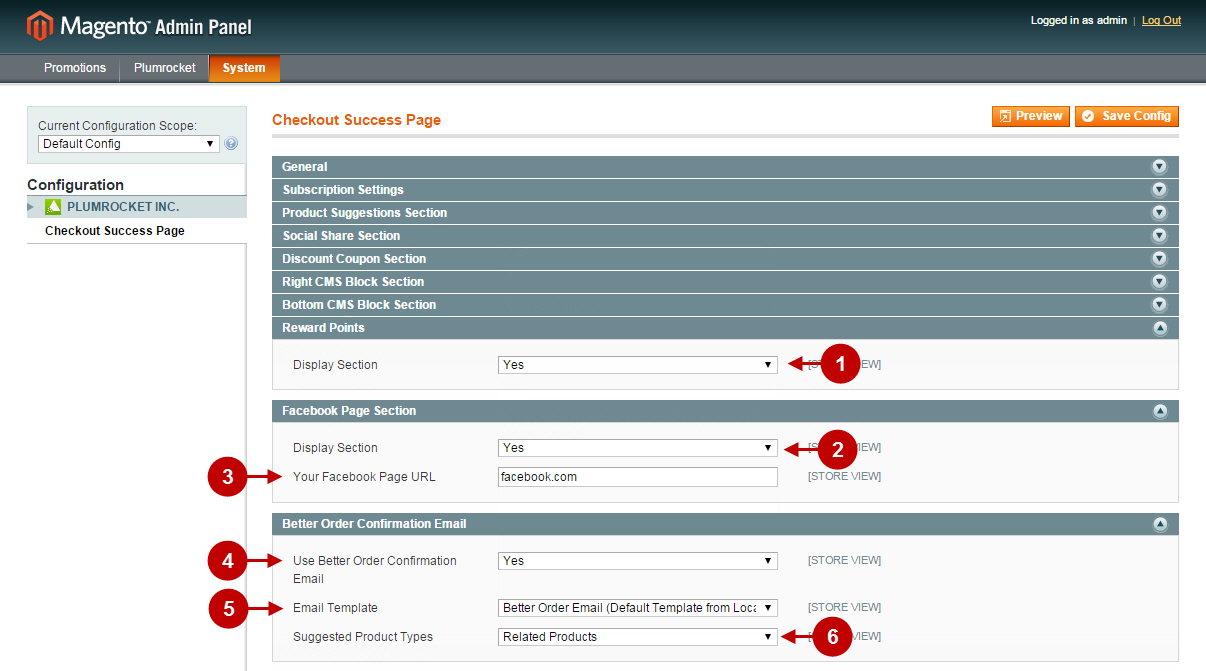
- “Reward Points” section: allows you to display the section with reward points customer earned and accumulated. Note: This section is active only if you have Plumrocket Reward Points Magento extension.
- Enable “Facebook Page Section” by selecting “Yes” from the drop-down menu.
- Specify your page URL users may “Like” in the “Facebook Page URL” field.
- Enable or disable “Use Better Confirmation Email” option.
- In the “Email template” section select the template of the confirmation email.
- In the “Suggested Product Types” section select the products to be included in the Better Confirmation Email.
Detailed description:
- “Link Color” option: allows you select the color of links on the checkout success page.
- “Link Hover Color” option: lets you choose links hover color on the checkout success page.
- “Button Background Color” option: allows you to select the background color of buttons on your checkout success page.
- “Button Text Color” option: lets you select the text color on the buttons of the checkout success page.
- “Button Hover Background Color” option: lets you choose buttons background hover color on the checkout success page.
- “Button Hover Text Color” option: allows you to select button text hover color on the checkout success page.
- Once you have finished configuring this checkout success page extension – press “Save Config” button to save your changes. You may also select the “Preview” option to preview your changes.

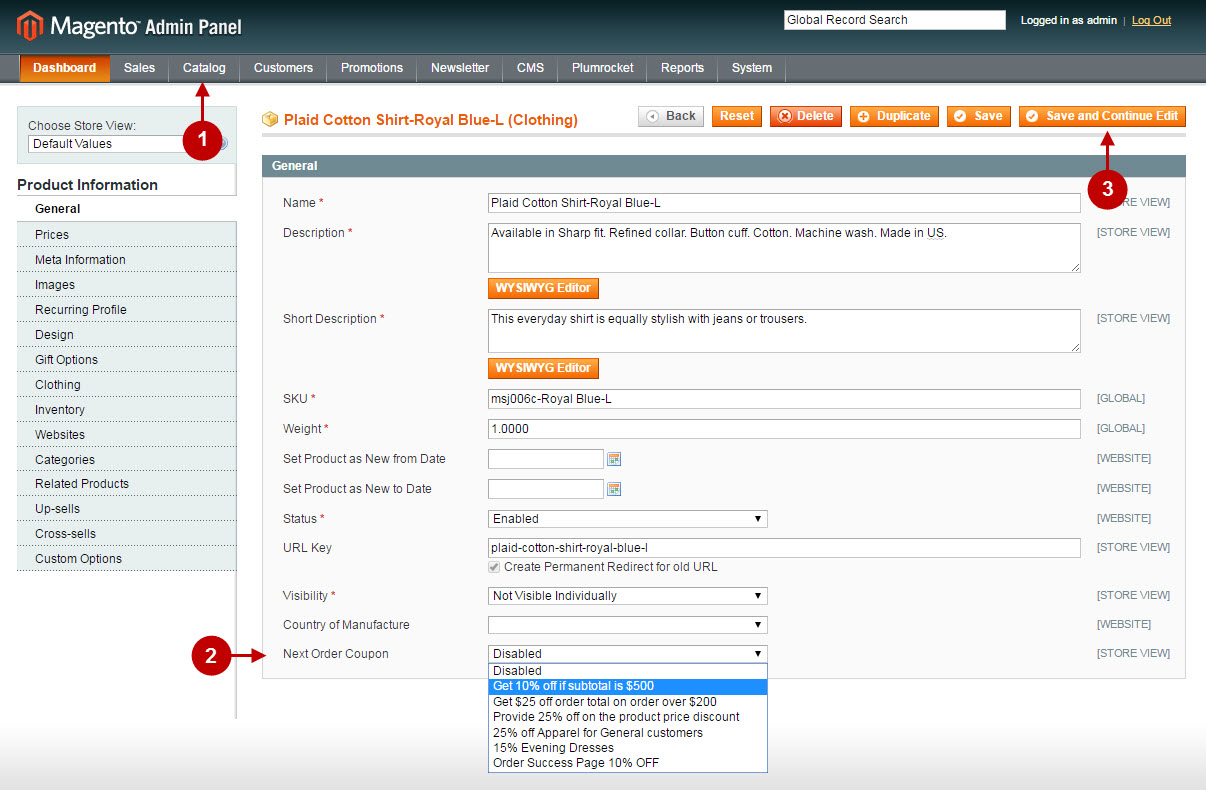
Setting Next Order Coupon for a Product
If you want to generate different coupons for the next purchases based on the products included in the order – please follow the steps below.
Detailed description:
- Go to “Catalog” > “Manage Products” > select the required product to set the coupon for.
- Navigate to “Next Order Coupon” option and set the needed coupon to be generated for the next purchase. Note: If there are multiple products with different shopping cart price rules coupons, the coupon with the highest rule priority will be applied. In case you leave this option blank, then the coupon that was set up in extension configuration will be applied.
- Save your changes by pressing “Save” or “Save and Continue Edit” button.
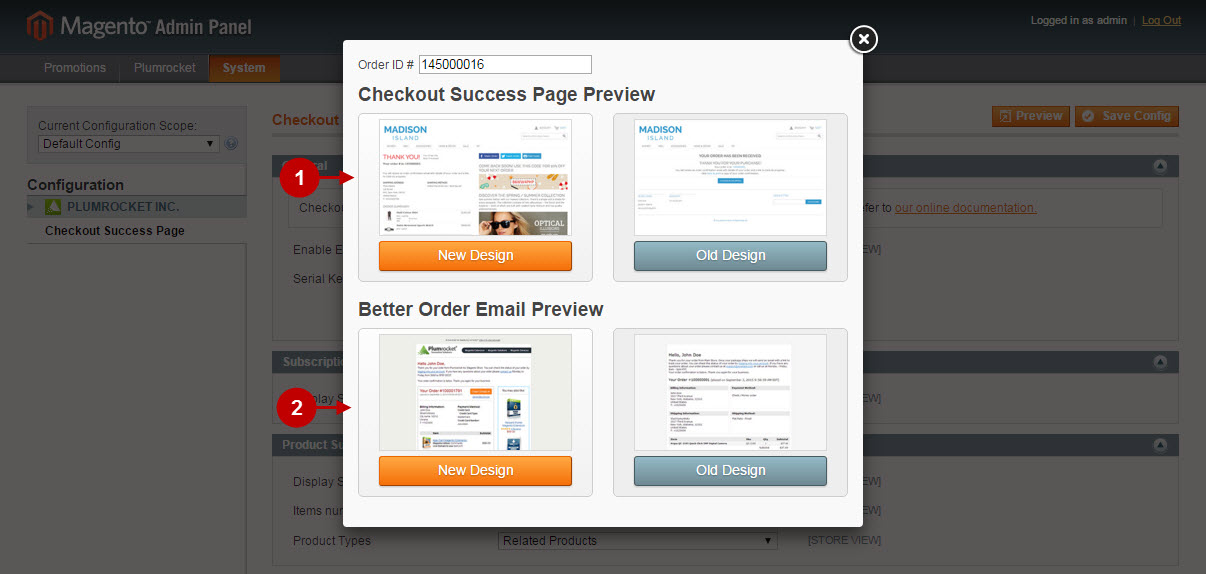
Testing Magento Checkout Success Page
Detailed description:
- After your press the “Preview” button you may check your customized Checkout Success Page.
- You may also check the newly designed Better Order Email.
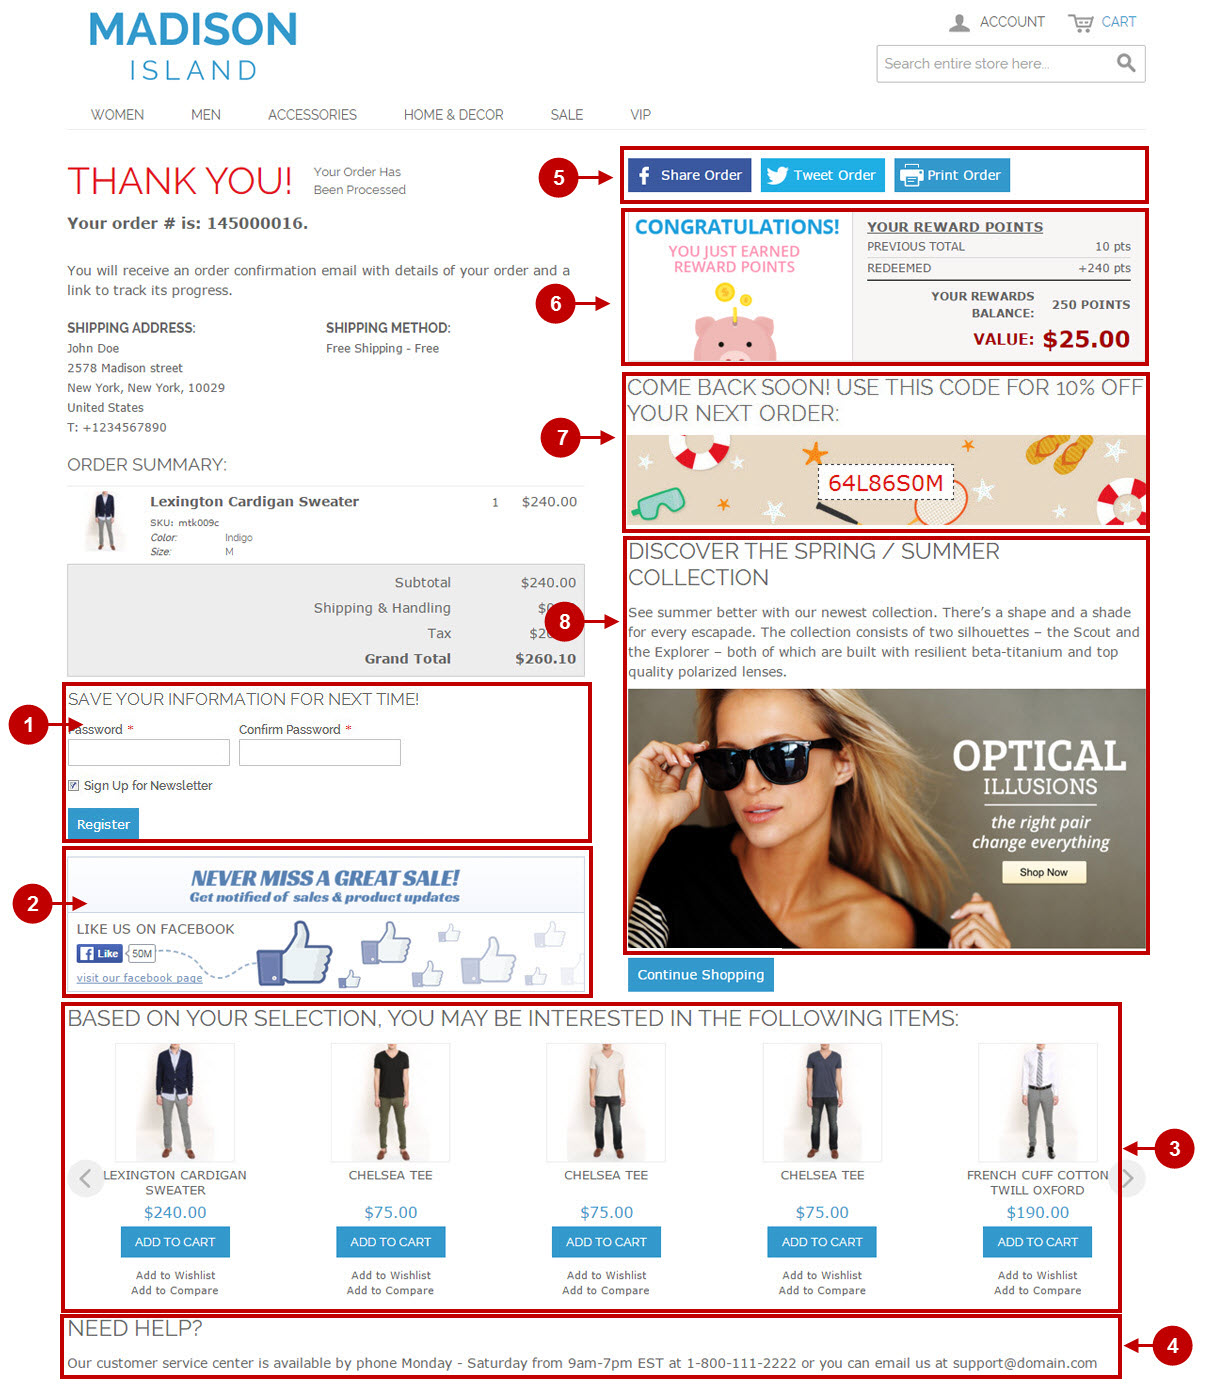
Preview of Magento Checkout Success Page
Here’s how these sections will look like on your frontend once enabled.
Detailed description:
- If enabled, this is how your Subscription and guest registration section will look like
- This section allows your customers to “Like” your page in the Facebook social network.
- This section displays suggested product types selected previously.
- In the Bottom CMS Block section you can advertise custom marketing messages to your customers.
- In the Social Share section users can share their order details in the social networks.
- This section displays reward your customer gets for the purchase.
- This section displays the Discount Coupons for your customers.
- If enabled, the Right CMS Block section allows you to display special deals for your customers.
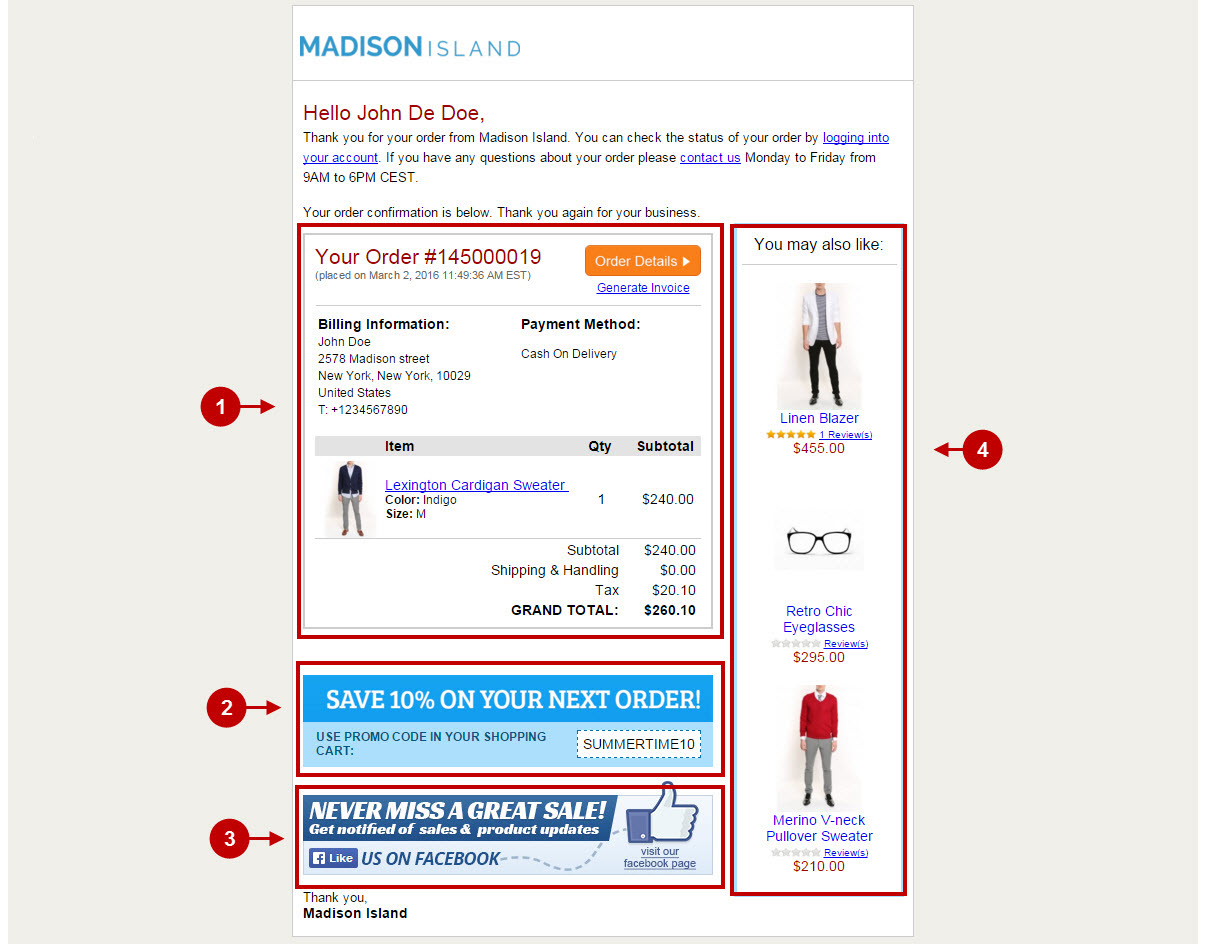
Preview of the Better Order Email
Detailed description:
- This is the block with your customer’s order details.
- This is the discount section your customer may use after the purchase. If the discount coupon section is enabled for Checkout Success Page, it will be shown in your order confirmation email.
- The section allows your customer to “Like” your page in Facebook. If Facebook Page section is enabled for Checkout Success Page, it will be shown in your order confirmation email.
- The block displays suggested products your customers will see in their Better Order Confirmation email.
Was this article helpful?